Brief Overview
Group Bookings are multi-patient appointments that can be useful for managing consults conducted outside the practice, as well as for offering general well-being or allied health classes.
The Short Version
- In Settings > Practice Details, ensure that Group Booking Enabled is ticked.
- In Settings > Define Your C2C > Appointment Types, create a new appointment type, tick Group Appointment and enter the maximum number of patients before clicking Save.
- In the Scheduler, open the Booking Window and select Group Booking.
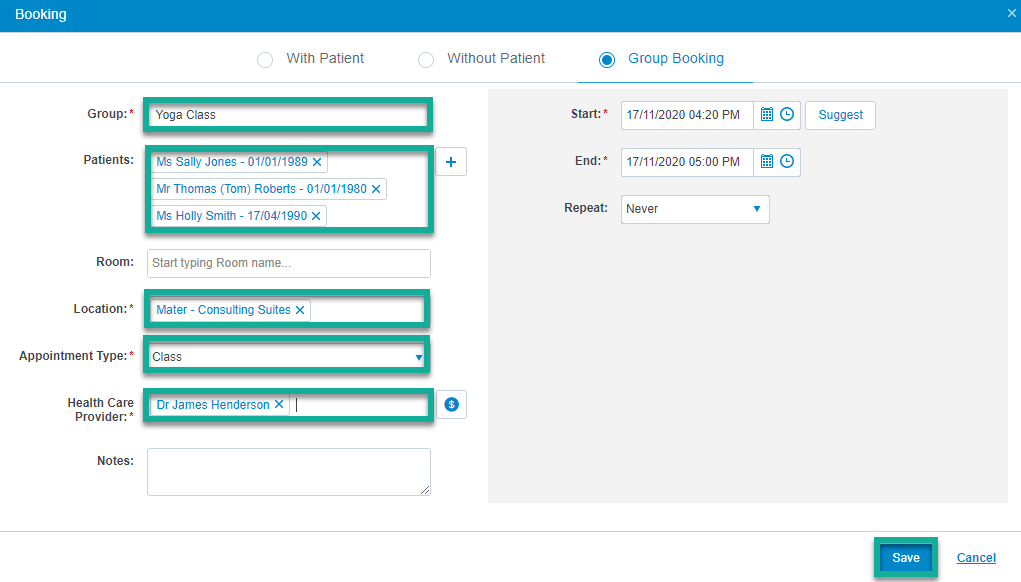
- Add a name for the group, add patients to create the group, and then click Save.
- Double-clicking on the appointment enables other patients to be added, as well as many other useful features including confirming patients' attendance and creating invoices.
Instructions
1. Click on the Settings cog and then click on Practice Details.

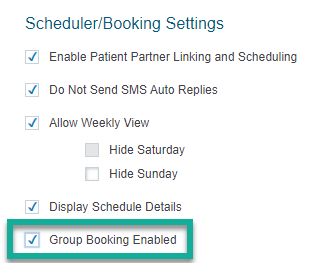
2. Make sure that Group Booking Enabled is ticked and click Save.

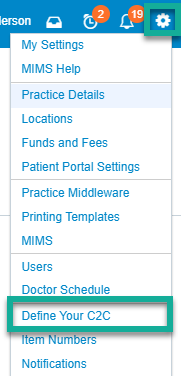
3. Click on the Settings cog and click on Define Your C2C.
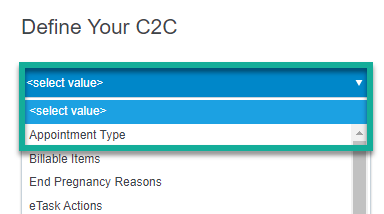
4. Click on the drop-down menu and select Appointment Type.
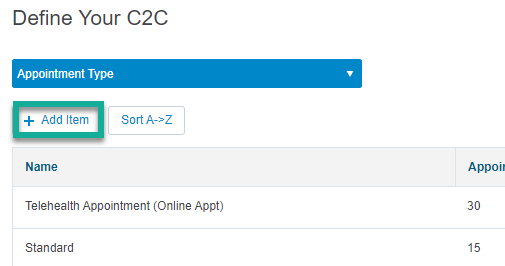
5. Click on Add Item.
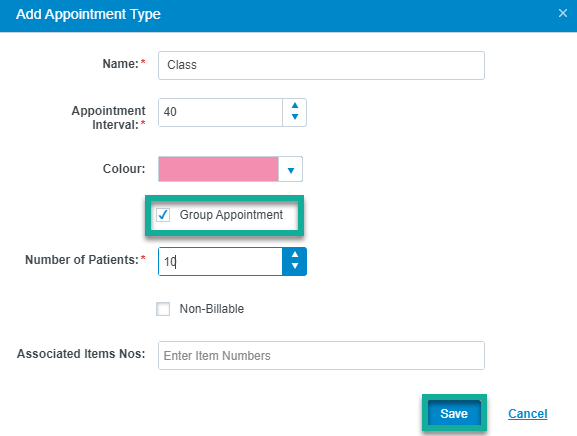
6. Tick the Group Appointment tick box, fill in all the fields marked with a red asterisk, and click Save.
7. Click on the drop-down menu and select Scheduler Category.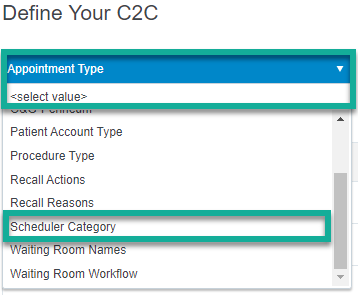
8. Click the Edit pencil icon beside the appropriate Scheduler Category, or click Add Item to add a new category.

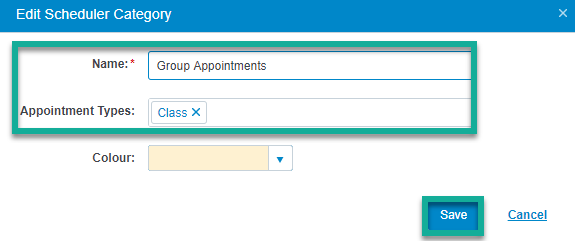
9. Add the existing Appointment Type into the Scheduler Category, or provide a new name for your category, and add the Appointment Type. Click Save.
10. In the Scheduler, double-click in the doctor's schedule or click the Add New Appointment button to open the Booking Window. Click on Group Booking.

11. Enter a name for the Group, select and add Patients, and check that all other fields marked with a red asterisk have correct values. Then click Save.
12. The new Group Booking in the Scheduler will list the number of patients currently added, as well as the places remaining.

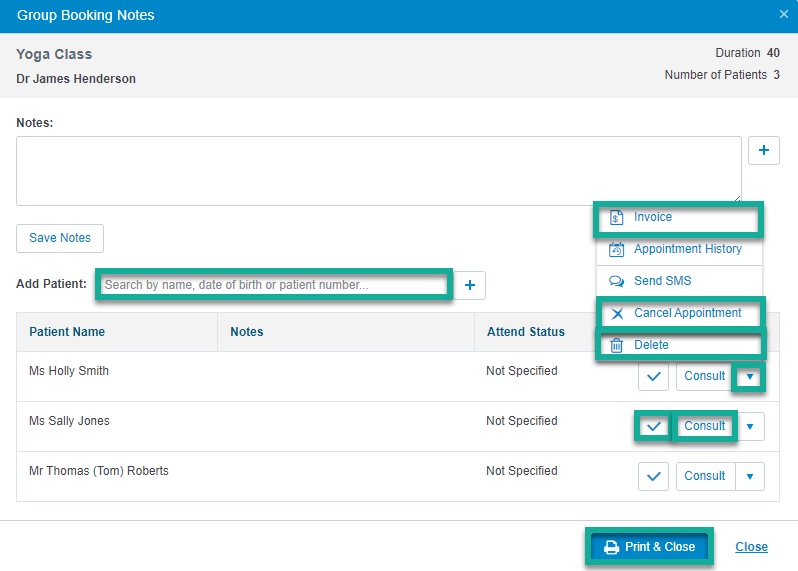
13. Double-click on the Group Booking to open the Group Booking Window if you need to confirm or cancel a patient's attendance, remove a patient, or invoice a patient. Use the downward arrow icon to expand the options related to a patient.
A) The Delete button will remove the patient from the booking.
B) The Cancel Appointment button will show the patient is no longer able to attend.
C) The Invoice button will allow you to bill each patient.
D) The tick icon beside a patient will allow you to confirm a patient's attendance.
E) You may add new patients using the Add Patient field to search for their names.
F) Click the Consult button to record a consult about the patient.
G) Use the Print & Close button to print the list of attendees.
