Brief Overview
This article will explore how to manually confirm and cancel appointments, update and reschedule appointments, and how to read an appointment at first glance.
Instructions
Confirming an Appointment
1. If you are using the SMS Appointment Notification function, then your appointments should be confirmed and cancelled directly by patients. There is more information on this here.
If you would like to manually confirm an appointment, click the Edit (pencil) icon beside an appointment.
2. Click Patient Confirmed Visit to manually confirm this appointment on the patient's behalf. Click Save.

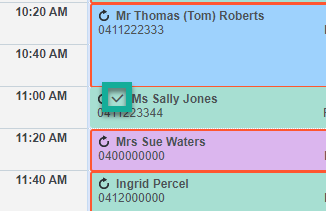
3. Once you have confirmed this appointment, you will notice the red box around the appointment disappear, and a Tick icon beside the patient's name on the appointment.
TIP: If you see a red box around an appointment (such as Mr Thomas Roberts' appointment below), this means the patient has not confirmed or cancelled their appointment.
Cancelling an Appointment
1. To delete an existing appointment click the Delete (X) icon against the appointment. You can also highlight the appointment, and use the Delete key on your keyboard to complete the same action.

2. Select a Reason, and add any Notes.
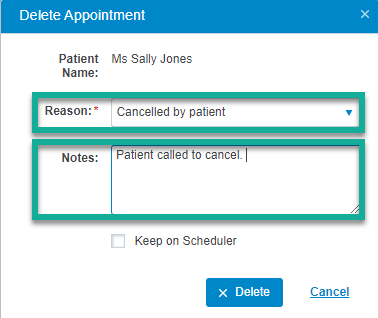
Note: The Reason selected, and Notes input against the appointment will be saved as part of the patient's Appointment History.
3. If you would like to keep the appointment shown on the Scheduler, but would like to cancel the appointment, tick the Keep on Scheduler box and then click Delete. If you would like to remove the appointment altogether and open the spot for another booking, simply click Delete.
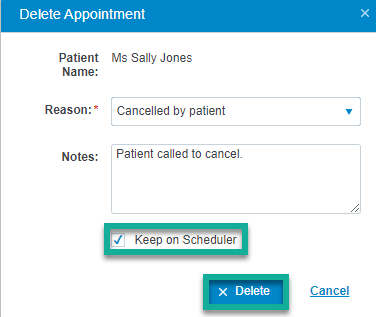
Note: All deleted appointments are shown in the patient's Appointment History, regardless of whether you choose to keep the appointment on the Scheduler or not.
Editing an Appointment
1. To modify an existing appointment click the Edit (pencil) icon.
TIP: You can search for an appointment by clicking Appointment History, entering the patient's name and looking in the Future tab.
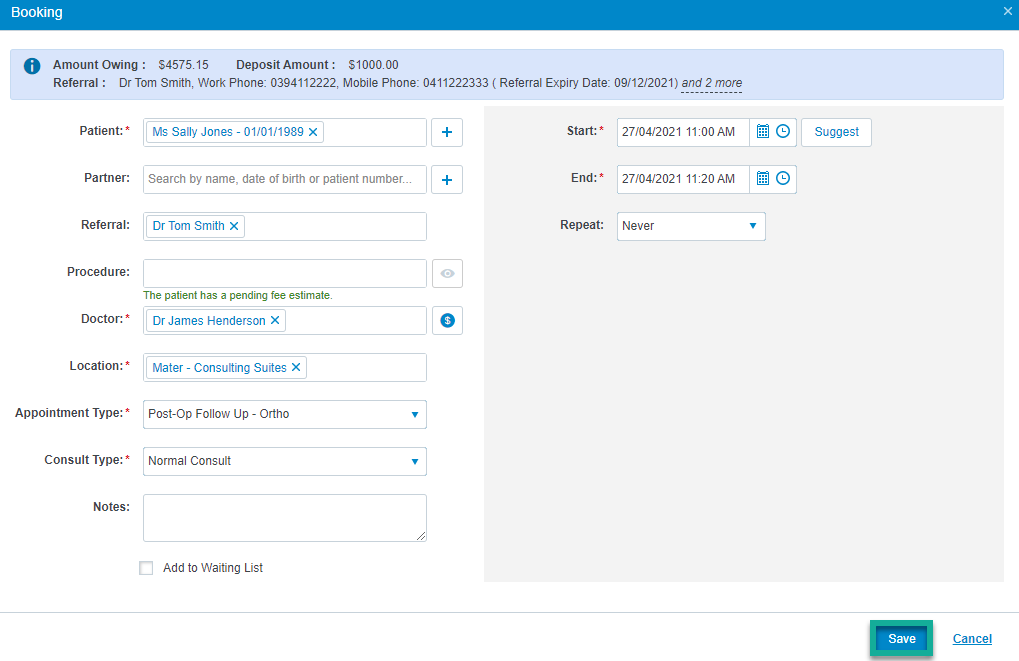
2. Make any necessary adjustments to the appointment details, such as the Start or End times, Appointment Type etc, and click Save.
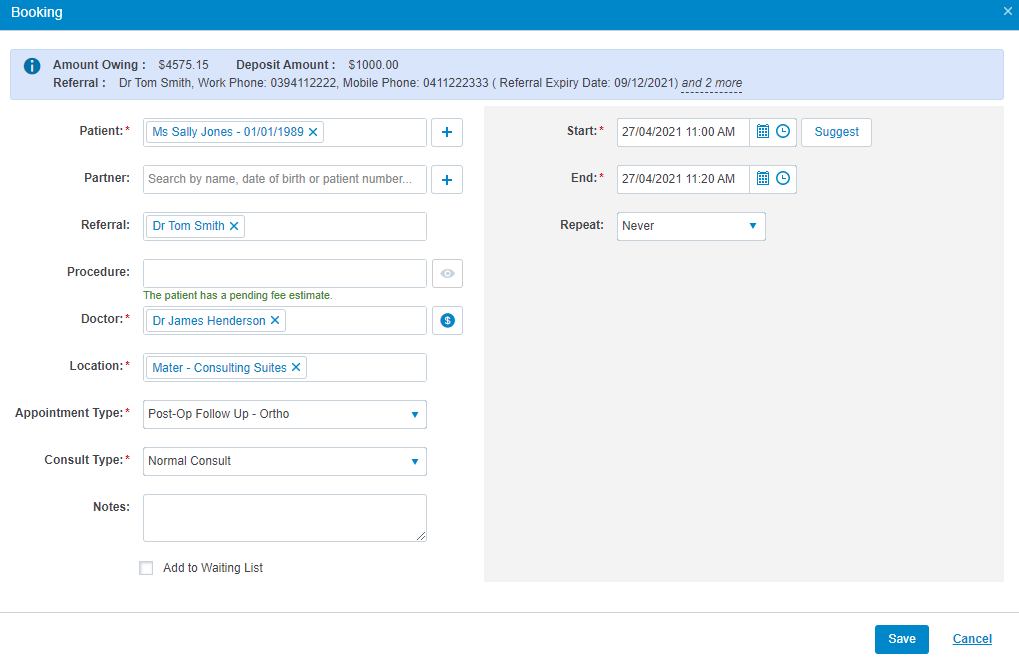
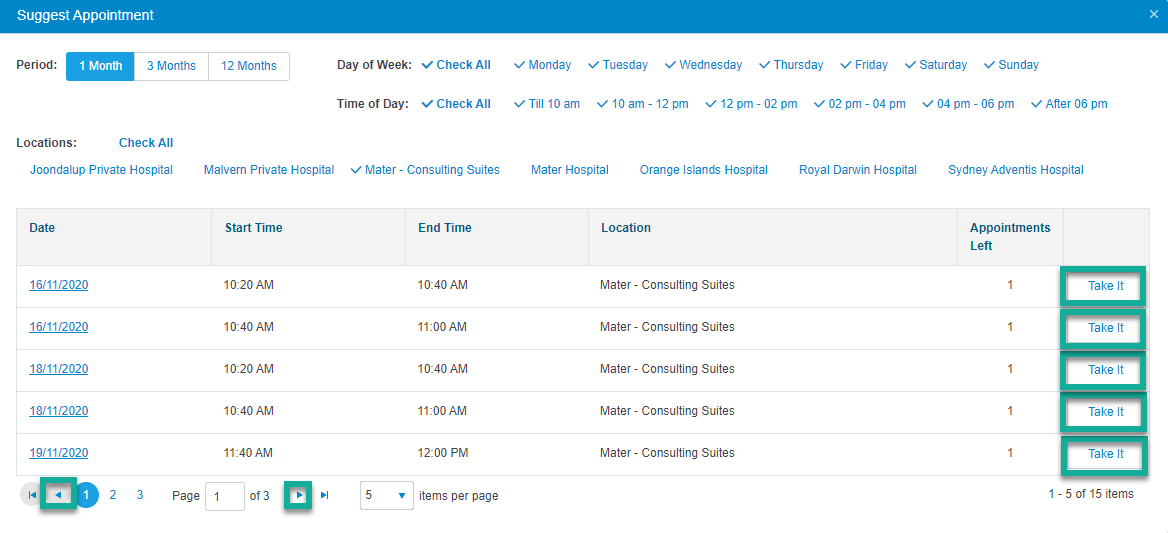
3. Clicking Suggest will allow you to filter the appointment search, to find an available time based on the provider's Schedule. You can use the arrows at the bottom of the page to flick through the available times. Book the appointment by clicking Take It.
4. Once you have made any necessary adjustments, click Save.
Reading an Appointment
How can I see if an appointment has been confirmed by the customer?
You will notice a tick on the appointment next to the patient's name, and the red outline will be removed from the appointment.

How can I see if an appointment has been cancelled by the customer?
The appointment will appear crossed out on the Scheduler.

What does the red box mean?
A red box around the appointment means the patient has not confirmed or cancelled their appointment. You may wish to give them a call to confirm, cancel or reschedule their appointment.
How can I move/adjust the appointment?
Click and drag the appointment on the Scheduler to a new location, or use the Edit function to adjust the time. You may also drag down the bottom of an appointment to increase the length, or drag the bottom up to extend the appointment duration.
How can I see more appointment details?
Hover your mouse over the appointment to display more appointment details and notes.

