Brief Overview
New patients are added by administrative staff from two main locations in Clinic to Cloud; the new appointment Booking window, and from the Patients menu or Patient List. Doctor users may also add patients from within a Lab Result or from the Assigned Messages window.
This article will cover how to add patients from the new Appointment Booking window, and via the Patients List and Patients menu.
Short Version
Creating a Patient from an Appointment:
- Double click on an empty timeslot in the Scheduler.
- Click the New Patient button beside the Patient field.
- Complete the required fields and click Save.
- Fill in the remaining appointment details and click Save.
Creating a Patient without an Appointment:
Note: You will need to know the patient's address and other contact information to add a patient via this method.
- Click the Plus + icon on the Patients menu.
- Enter the patient's information into all required fields in the Demographics tab.
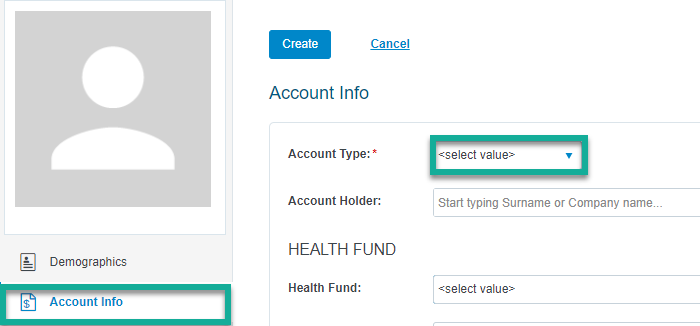
- Open the Account Info tab and select the patient's Account Type from the field provided.
- Click Create.
Instructions
Creating a Patient from an Appointment
1. Double click in an empty appointment timeslot to open the Booking screen. 
2. Click the New Patient button within the Booking screen. 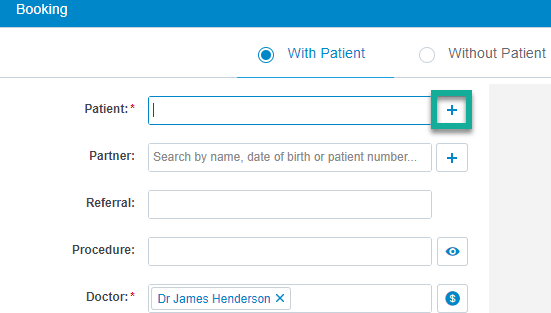
3. Fill in the patient's details and click Save.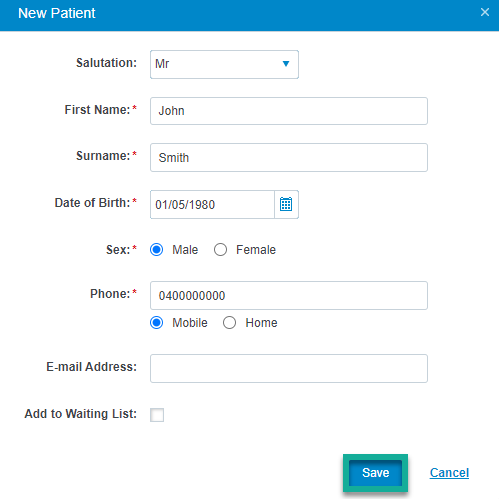
4. Complete the remaining appointment details as required and click Save.
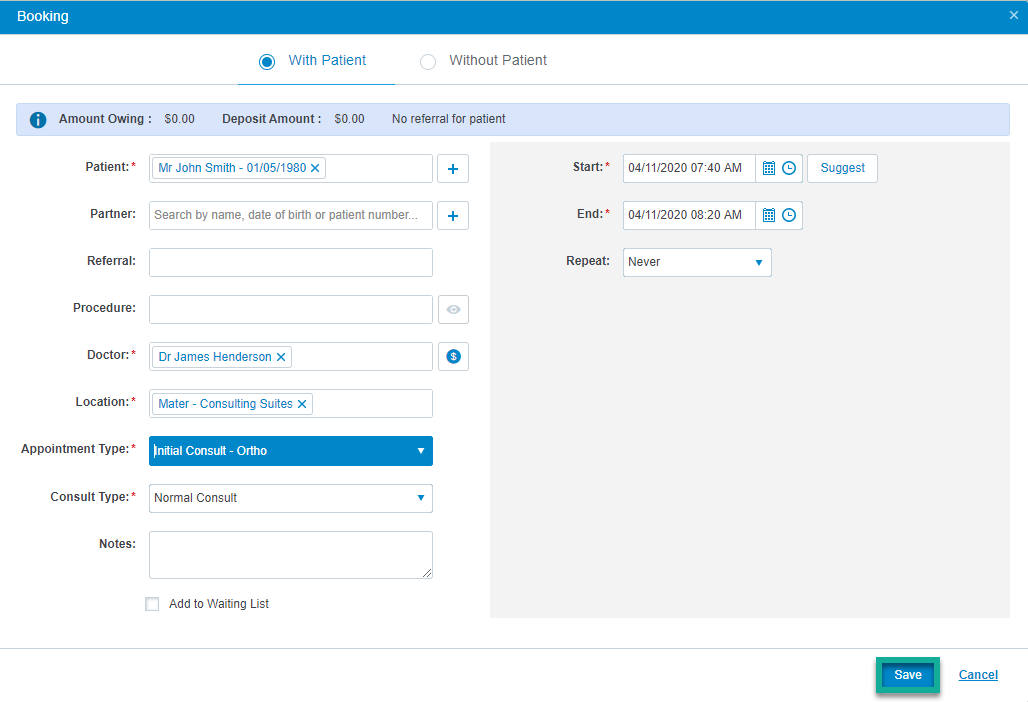
5. The patient's appointment will then appear in the chosen time slot in the Scheduler, and the patient's record will be created in Clinic to Cloud. 
Creating a Patient without an Appointment
Note: To create a patient via this method, you will be required to have more patient information on hand to complete their profile before being able to save.
1. Click the Plus + icon on the Patients menu, or click on the Patients menu and select Add Patient from the Patients List.

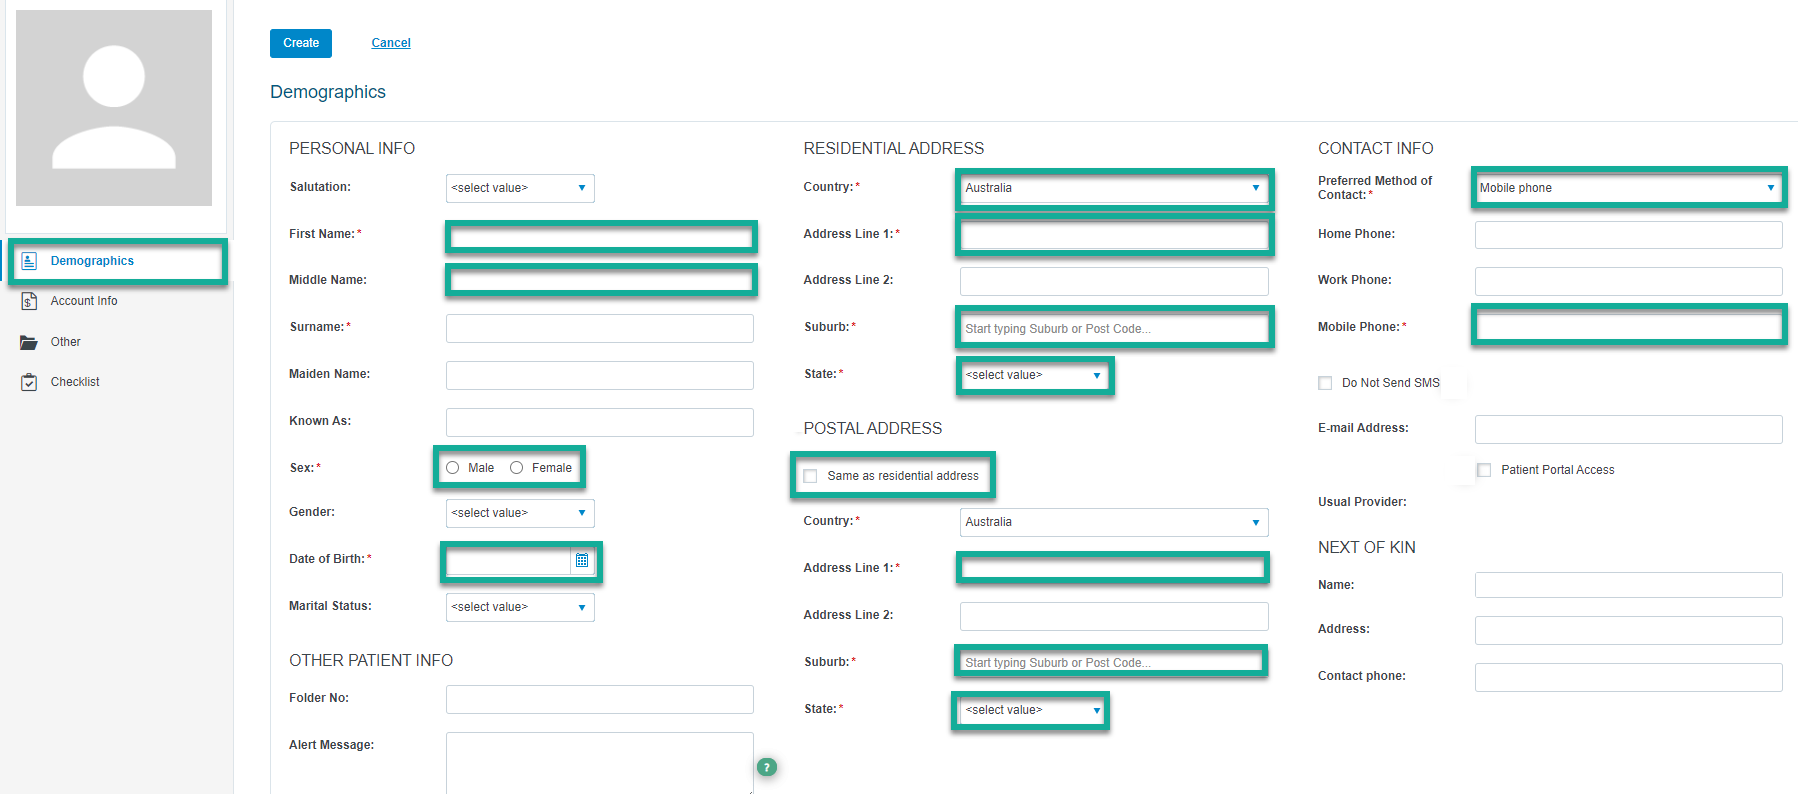
2. Enter the following required patient information into the fields marked with an Asterix * in the Demographics tab:
- First Name
- Surname
- Sex
- Date of Birth
- Address Line 1
- Suburb
- State
- Postal Address Details (if you have not ticked Same as Residential Address)
- Preferred Method of Contact
- Mobile Phone/Home Phone/Work Phone (depending on your selection for Preferred Method of Contact)
3. Enter the Account Info tab and select the patient's Account Type from the drop-down menu.
4. Enter any other information you have for the patient into the fields provided, then click Create. 
Notes:
- If your practice has the Patient Portal enabled, then you will need to have an email address entered for the patient for them to receive an invitation. If the patient has been created via the Booking window, then the patient will receive an invitation automatically. If the patient was created via the Demographic window, then the Patient Portal Access box will need to be ticked in the Demographics tab for the patient to receive the invitation.
- Once the initial patient file has been created, more tabs will become available to add more patient information, such as a referral, workcover claim details, any interested parties for the patient, and more.
- Click the "Related Patient Management Articles" link in the Further Reading section of this article to review more information on the Patient Demographics window.