Brief Overview
Clinic to Cloud enables practices to easily create and manage Recalls to ensure all patients are cared for and none are missed.
The Short Version
- All due or overdue Recalls will be flagged with a number inside a red bubble next to the Recall icon.
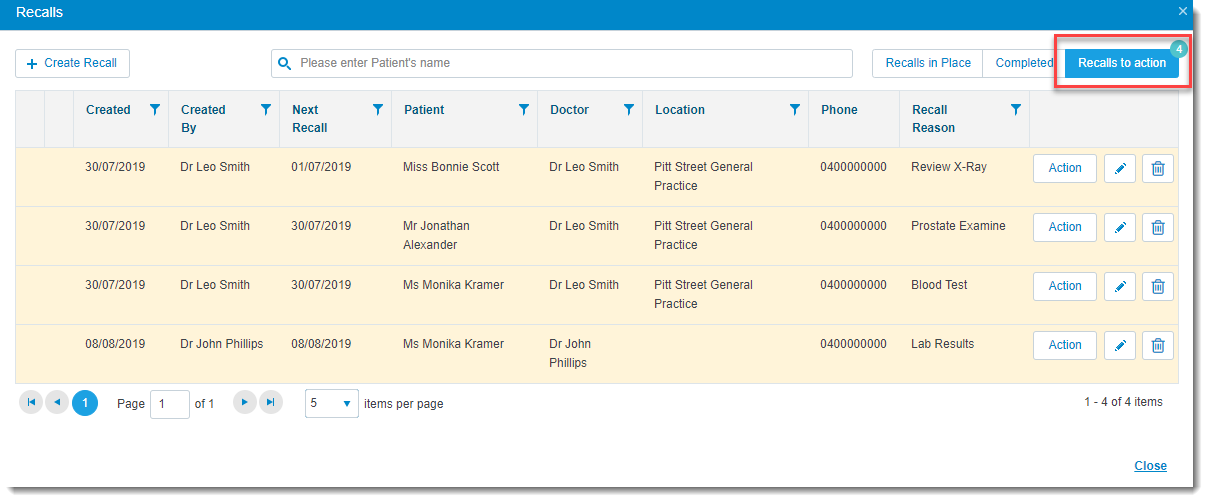
- Recalls are separated into 3 sections, making it easier to manage: Recalls in Place, Completed and Recalls to Action.
- Recalls in Place refer to those recalls approaching their due date.
- Completed refers to those recalls that have been completed.
- Recalls to Action refer to recalls that are either due or overdue.
Instructions
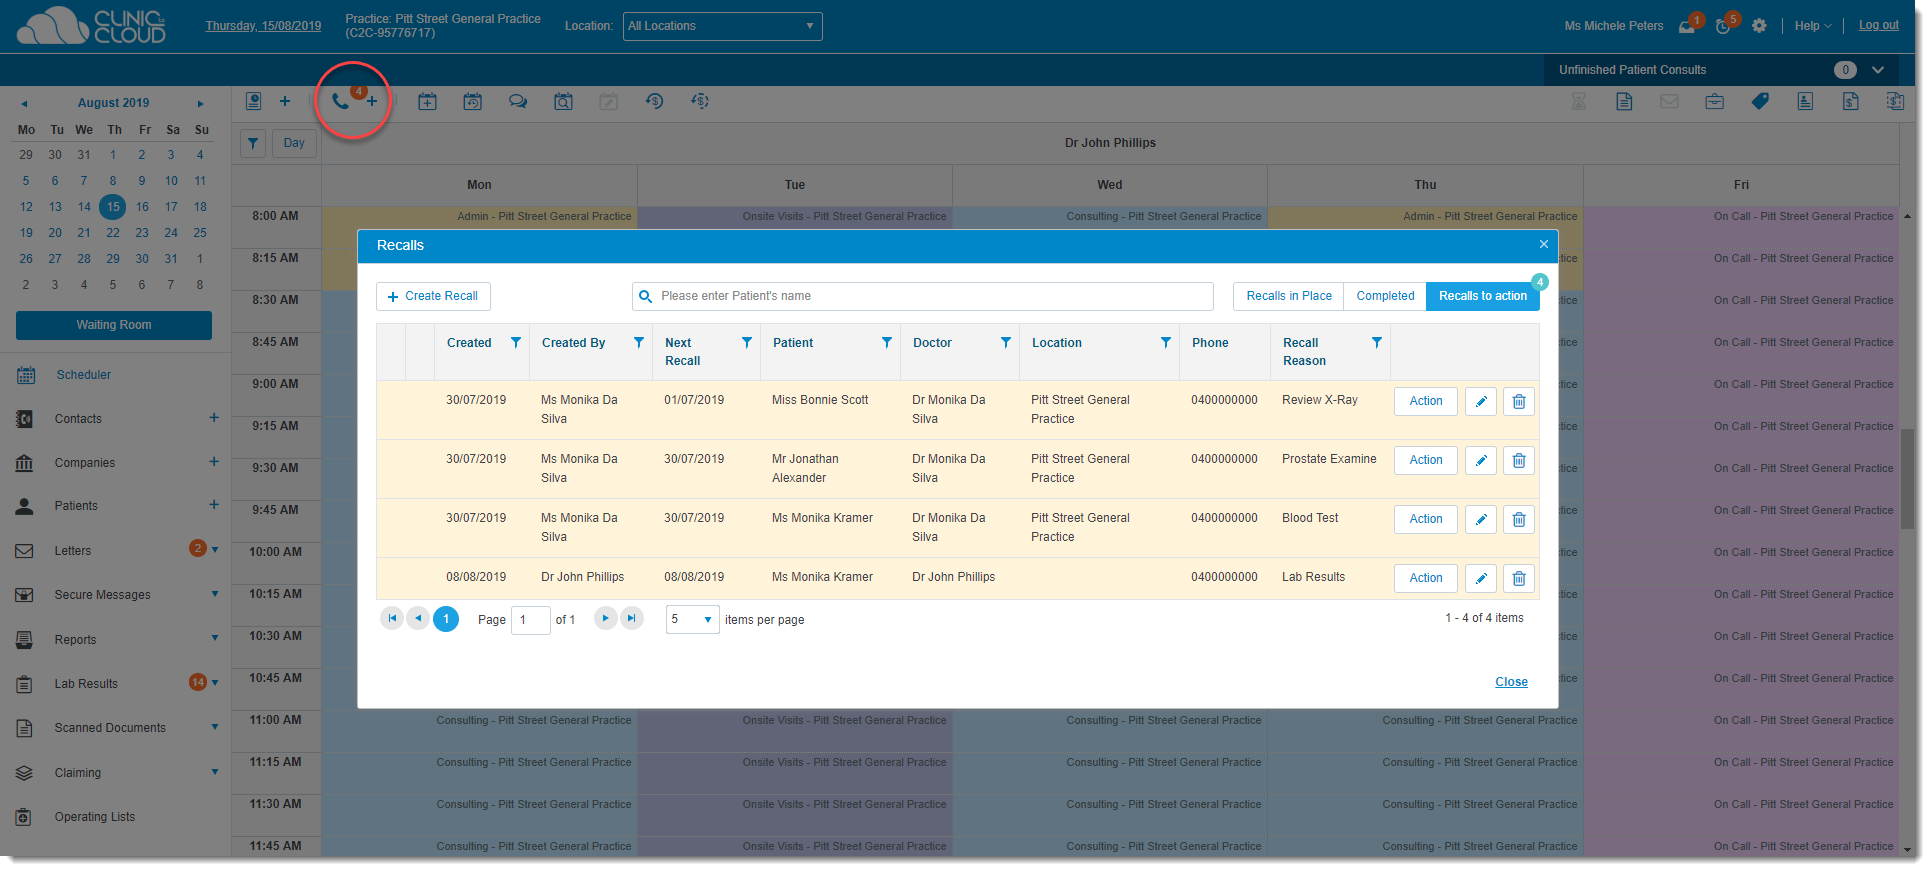
- To view and manage your Recalls, click the Recall Icon:

- The default tab upon opening the Recalls window is Recalls to Action as this is a priority:
- From the Recalls to Action tab, the following actions can be made: Action, Edit or Delete:
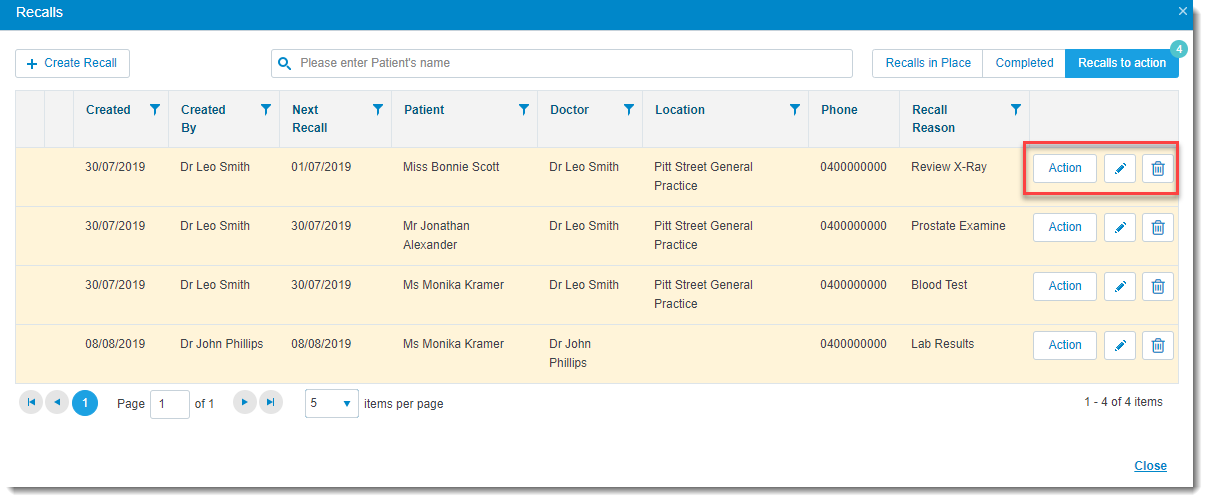
- To action a Recall from the Recalls to Action tab, click Action and enter additional notes prior to clicking OK to complete this Recall:
Note: If more than one attempt is made to recall, they can edit the recall and add notes. This is because actioning the recall puts it in the completed tab which means that it risks being overlooked.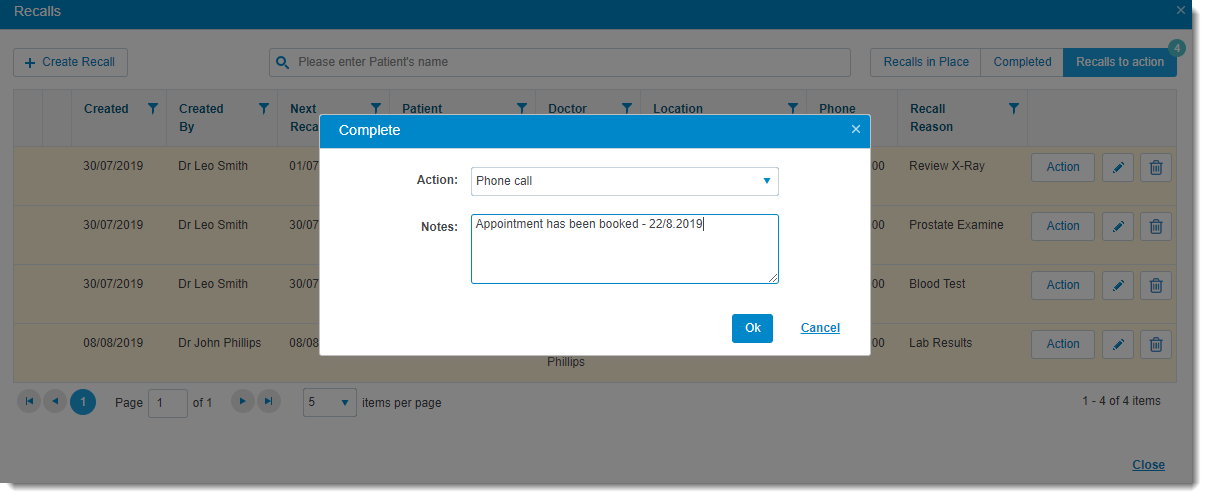
- All Recalls that have been completed will be recorded in the Completed tab.
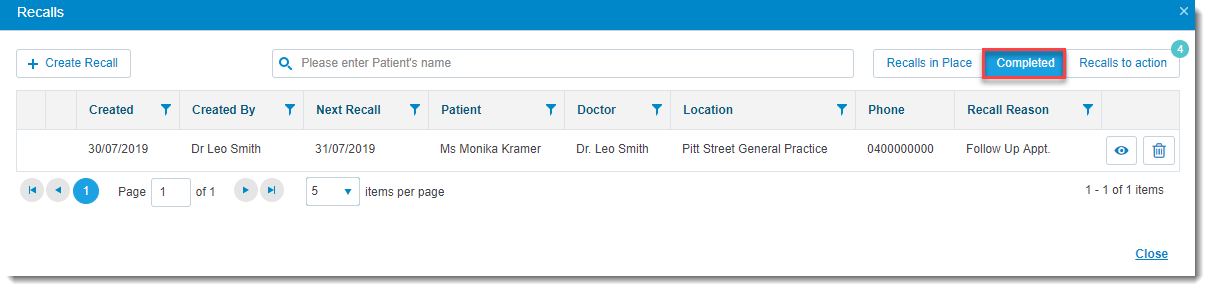
Note: You can View or Delete a completed Recall from the Completed tab. - View upcoming Recalls in the Recalls in Place tab.
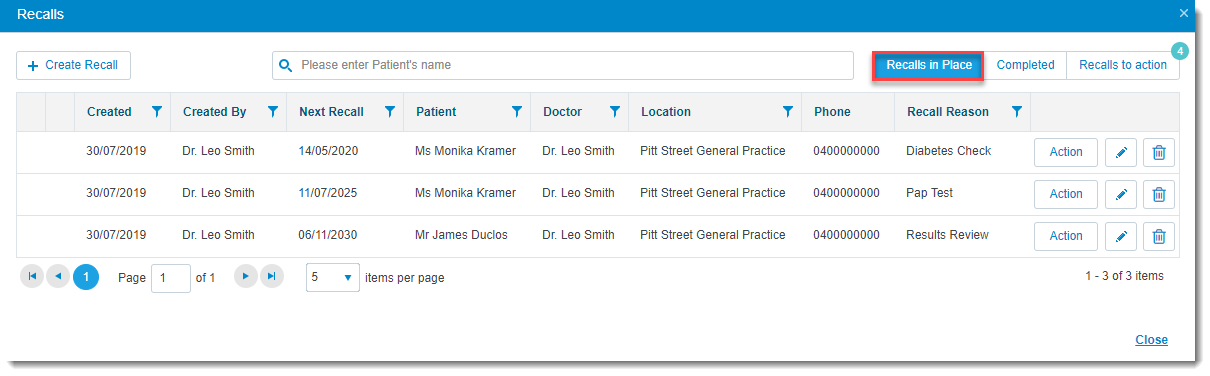
Note: From the Recalls in Place tab, the following actions can also be made: Action, Edit or Delete.
Learn how to create recalls by clicking here.