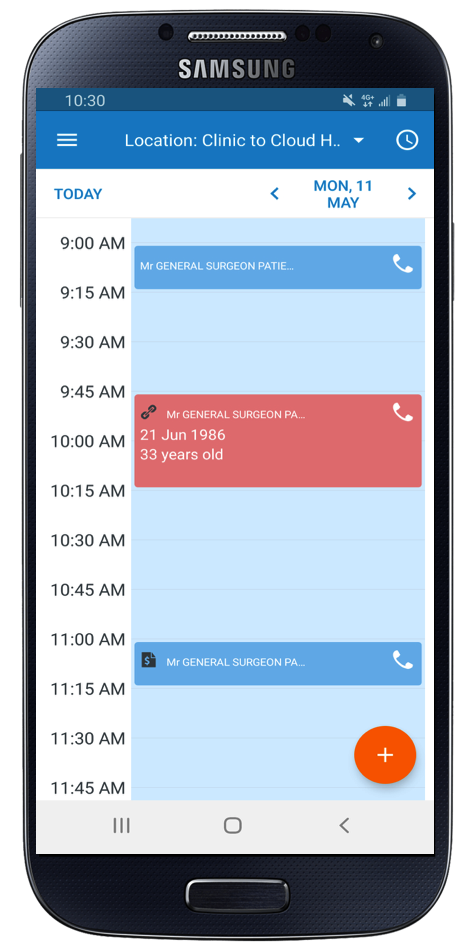
To start a Consult click on the patient appointment from the scheduler, this will open the consult screen.
To add Clinical Notes:
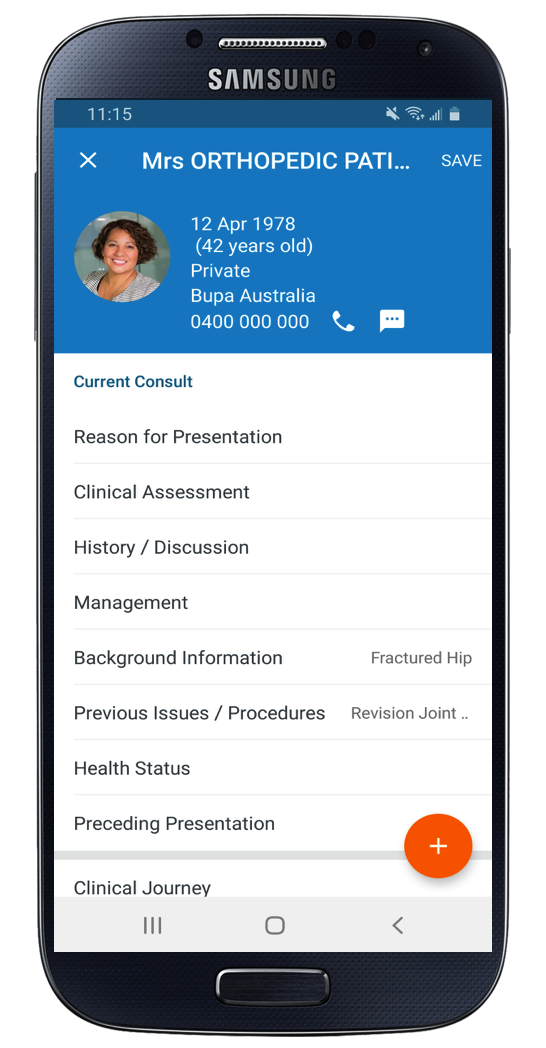
You can add notes to the areas below by clicking
- Reason for Presentation
- Clinical Assessment
- History / Discussion
- Management
- Background Information
- Previous Issues / Procedures
You will be able to free type into each of these sections.
If you are using Voice Recognition within Clinic to Cloud you will be able to dictate into each of these options by clicking on the record icon.
How to create a Prescription
1. Click on the plus sign at the bottom of the consult screen
2. Select 'Prescription'
3. Select from current 'Favourites' or search 'Medication'
4. Add details of medication
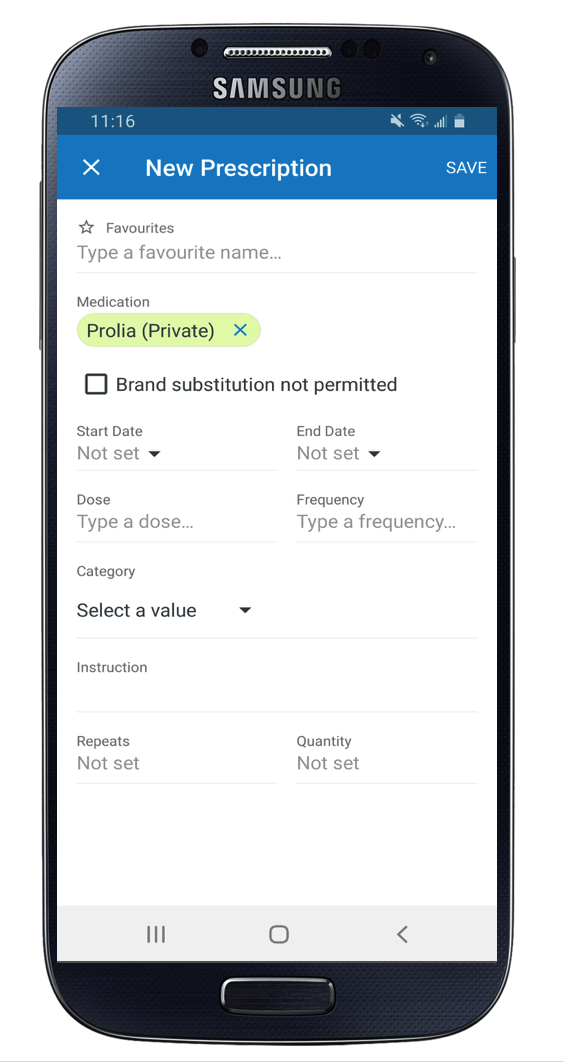
5. Click 'Save'
How to create a Pathology or Imaging request
1. Click on the plus sign at the bottom of the consult screen
2. Select 'Imaging Request' or 'Pathology Request'
3. Add details of request
4. Click 'Save'
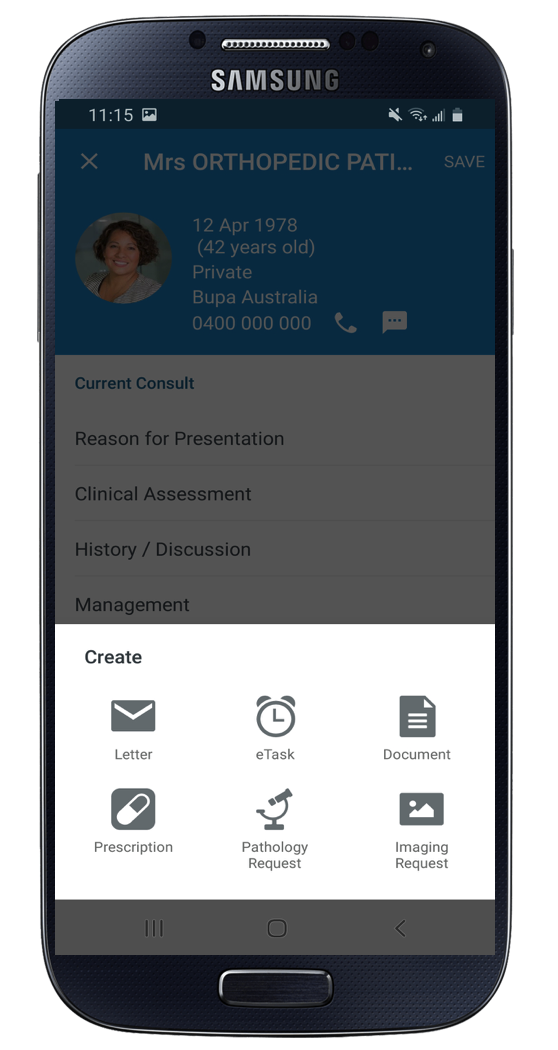
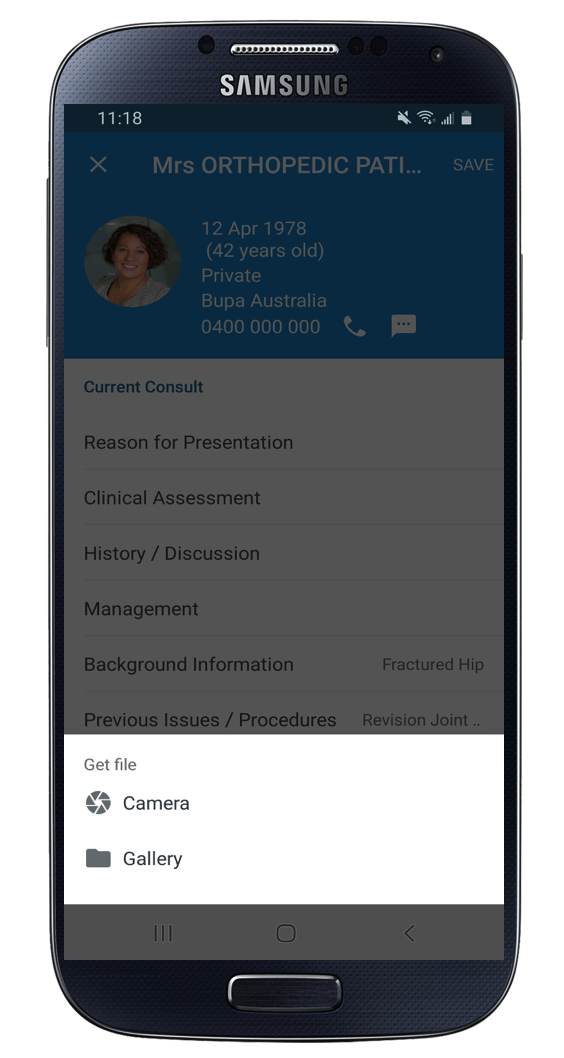
To attach a Document or Photo
1. Click on the plus sign at the bottom of the consult screen
2. Select 'Document' to select from existing Gallery or to use Camera to take a photo
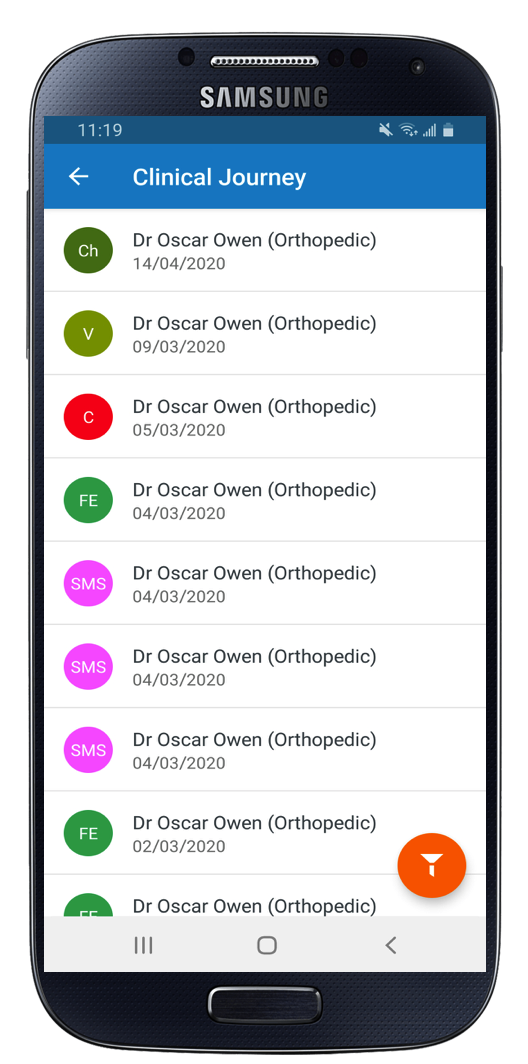
To view the Clinical Journey
1. Click on 'Clinical Journey'
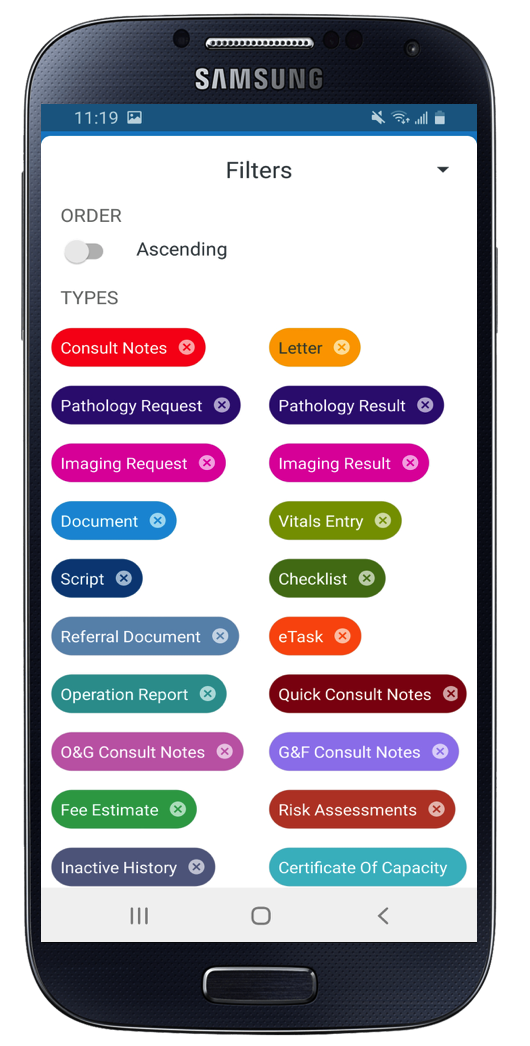
2. Click the downwards arrow to order the Clinical Journey by oldest first
3. Click on the filter icon to select which areas of the clinical file you would like to see in the Clinical Journey
4. You can click into each section of the Clinical Journey to see the details of this entry
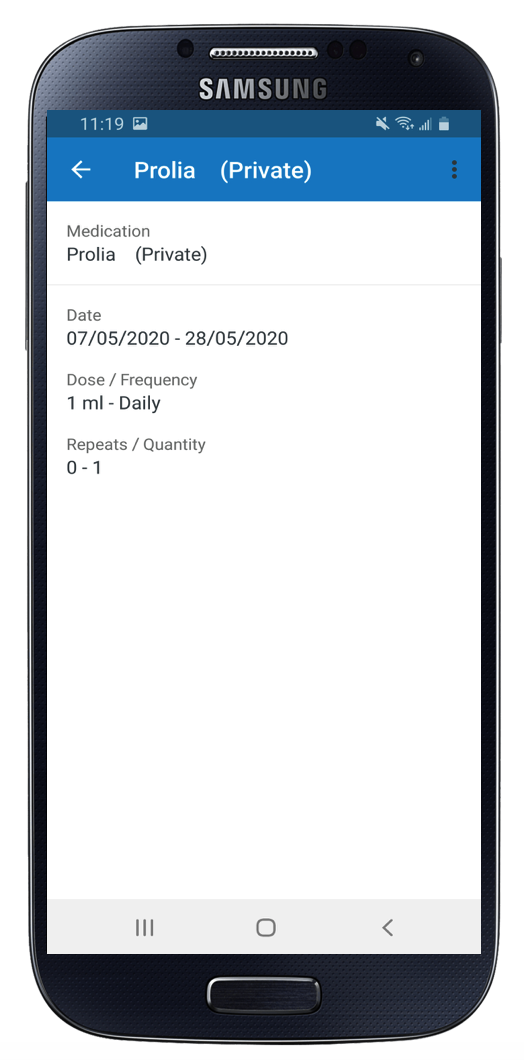
To view/edit Medication
1. Go to the 'Current Medication' area of the consult, you can view both Current and Archived medications

2. Click on the medication to view details
3. Click on 'Edit' to make changes to the medication, click 'Save' to save these changes
To view Vitals
1. Go to 'Vitals' section of the consult
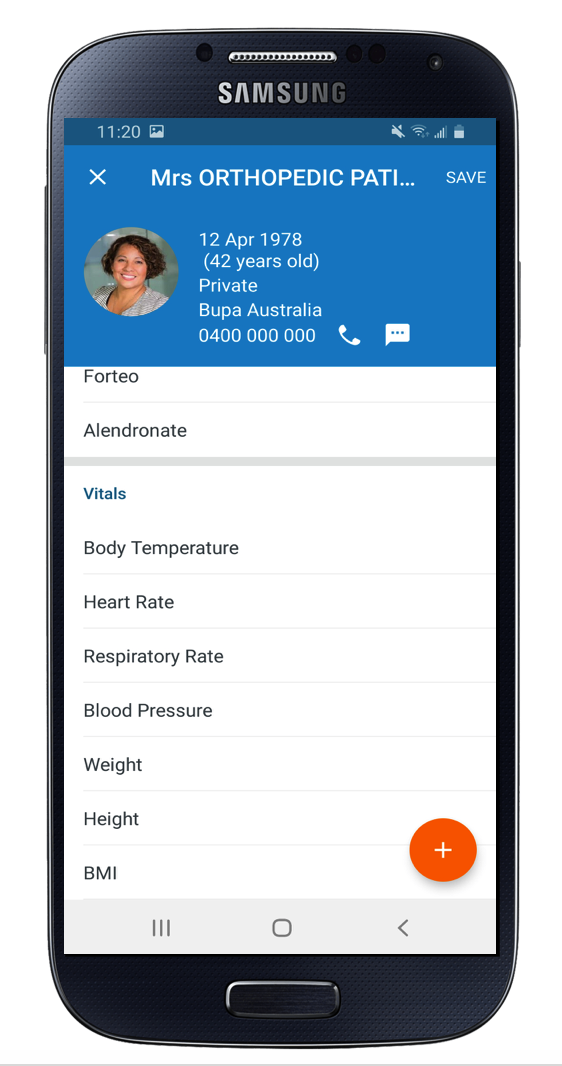
2. Select each Vital to see a graph of this vital data
To Call the patient
Click on the 'Call' icon to call the patient directly

To create an eTask
1. Click on plus sign at the bottom of the consult screen
2. Select 'eTask'
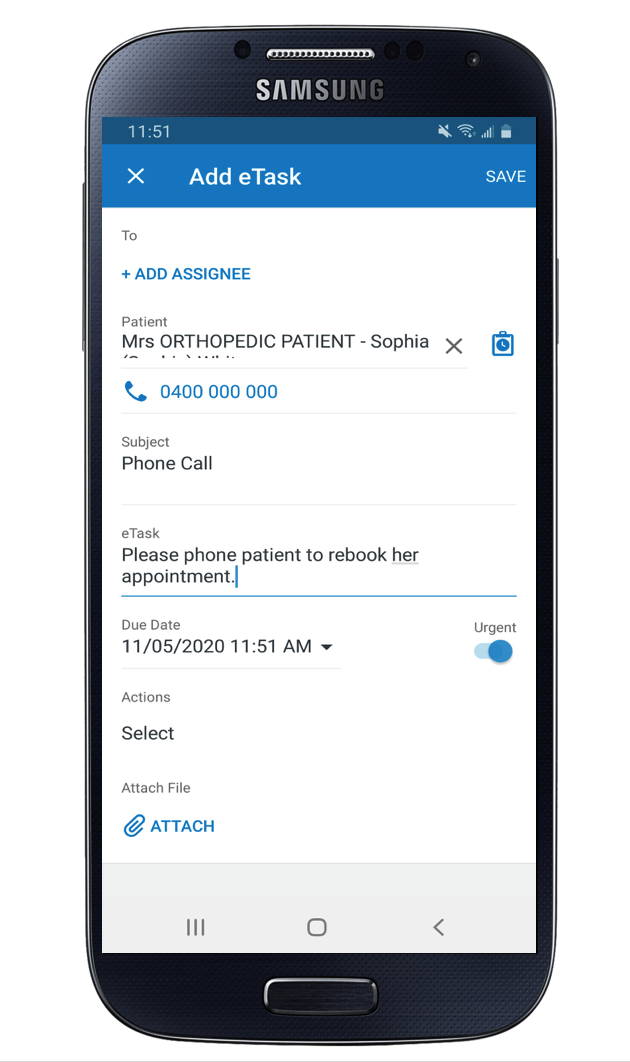
3. Add subject and notes with free text
4. Select 'Due Date'
5. Select if the eTask is urgent
6. You can remove the patient from the eTask or change which patient it is for my clicking the cross next the the patient name
7. You can create a 'Quick Consult' by clicking the icon next to the patient name
8. Choose 'Assignee' from users
7. Select 'Attach' if you would like to attach a file to the eTask
6. Choose an 'Action' for this eTask
You can also call the patient directly from the eTask by clicking on the phone icon.
Android App - eTask Management
Patient Demographics
You can also view the patient demographic file by clicking on the patient name.