To bill multiple patients you will need to click one of the patients appointments before you will have the ability to create the multiple invoices.
(invoice icon for the patient label is located on the top right side of the scheduler page)
1. Click the patient has an appointment on the scheduler you can click their appointment once to highlight it (it will show a blue line around the appointment if it is highlighted) then click the invoice icon (shown above)

2. Choose your 'Type of Patient' 'Type of Invoice' 'Additional Patients' (type the names of other patients)
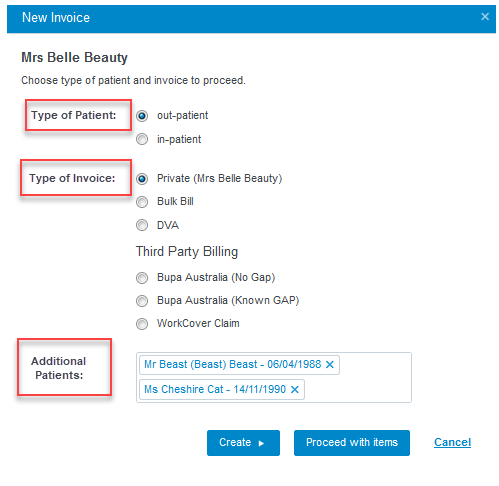
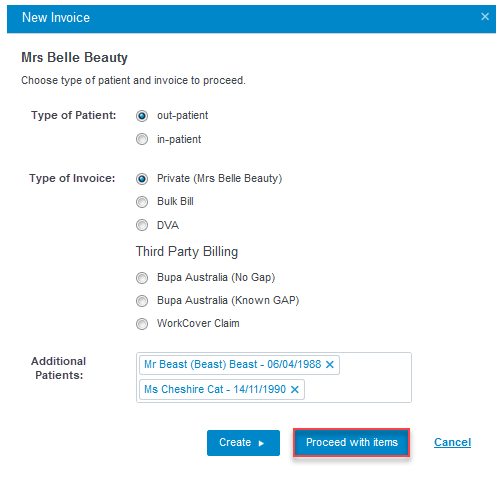
3. Click the 'Proceed with Items' option
4. Add the relevant item numbers by Type in the 'Item No' if known.
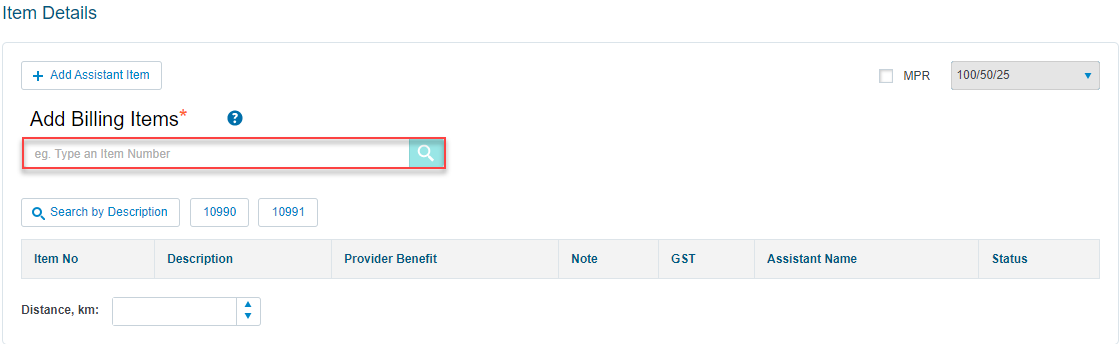
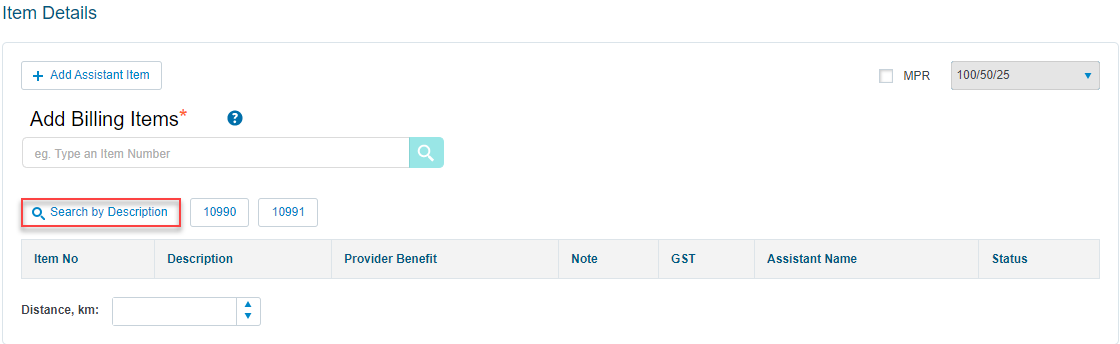
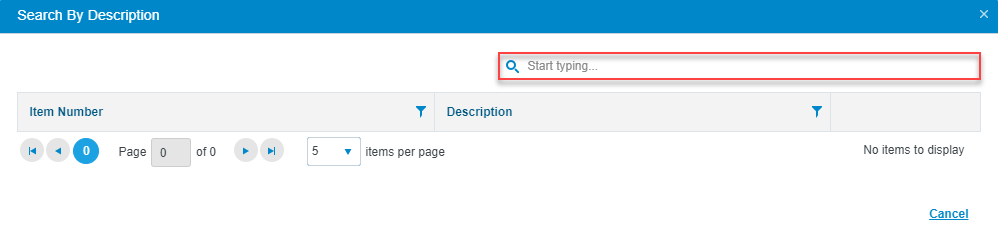
5. Alternatively you can 'Search by Description'
6. Once you have added your item you need to complete the relevant details for the item.
- You have the ability to add or change the 'Date of Service'. You can also add multiple dates onto one invoice.
- Choose the relevant 'Payment Type'
- Add 'Duration' time if relevant
- Tick the 'Not related Care Plan' or 'Not Standard Aftercare' if relevant
- Add 'Notes' to this item number if relevant

7. Once the items are added, click 'Create Invoices'

8. The main patients invoice will open. All of the relevant information will pull into the invoice from the appointment. If you have invoiced incorrectly (under the wrong location, date, account holder) you will need to re create the invoice.
9 The referral can be changed if required by clicking the 'Drop Down Arrow' or if there is no referral you can click the 'Plus icon' next to the 'Referral' section to add the referral details.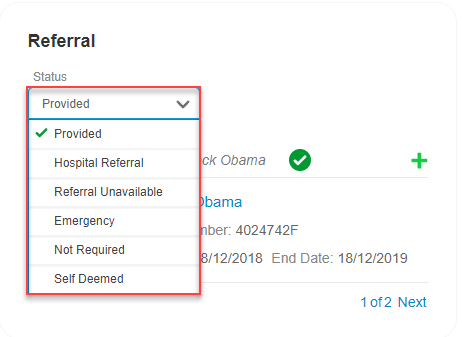
10. There are optional fields to complete if required
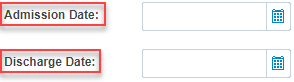
- 'Admission Date' and 'Discharge Date' are not mandatory fields, but if you want to complete them you can. If you do complete this section this invoice must be created after the patient has been discharged or it will error.
- 'Imaging Machine' only needs to be completed if you are billing for an LSPN related item number.

11. To view the other invoices you will go to the 'Related Invoices' section and click the patient name to go to demographics or the invoice number to go to the invoice.

13. If this is a Bulk Bill, DVA or Health Fund invoice click 'Save and Close' on each invoice and submit your claim through Medicare or Eclipse.
How to Submit Eclipse Claims
How to Submit Medicare (Bulk Bill/DVA) Claims
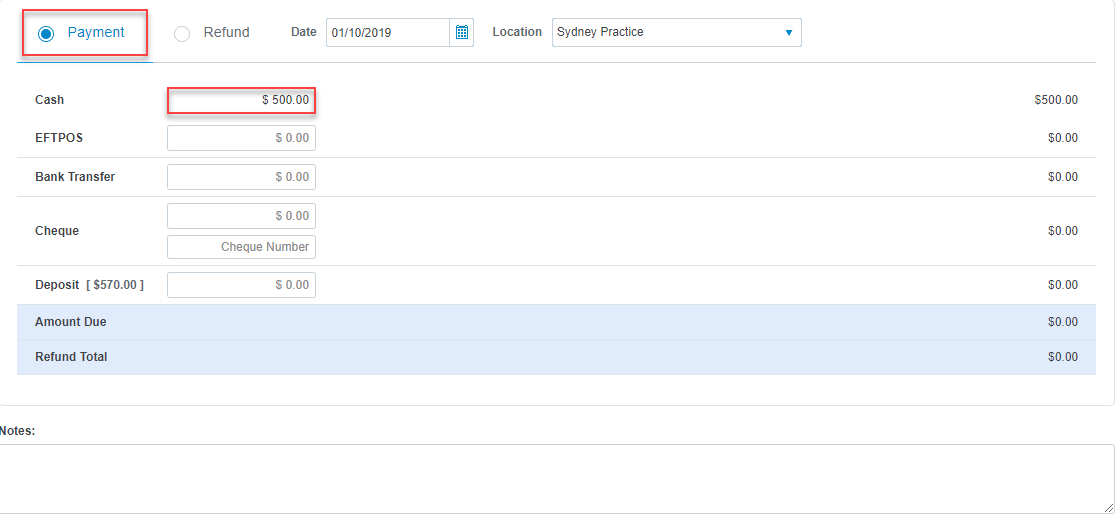
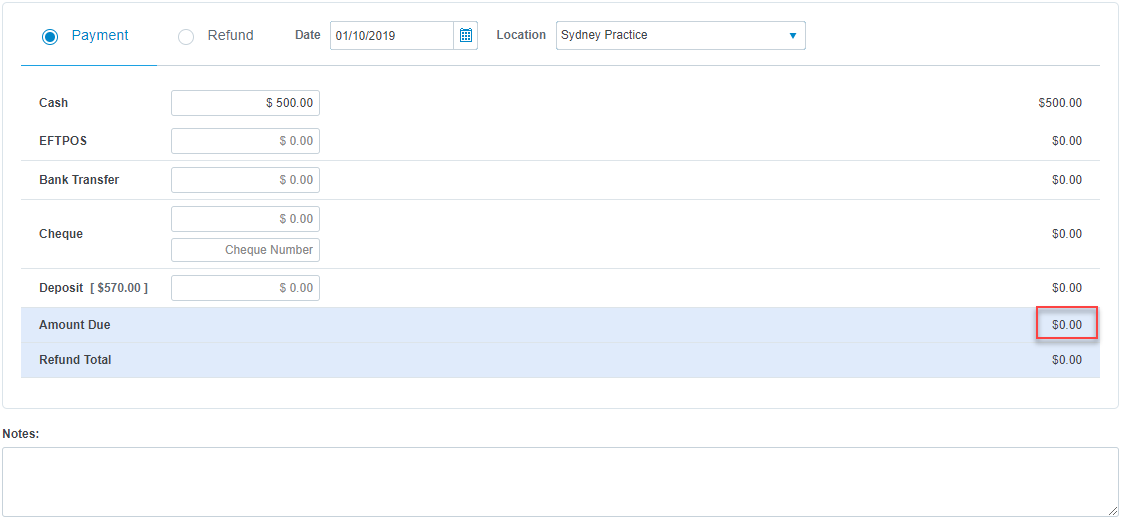
12. If this is a private invoice, You will need to add payments manually to each individual invoice.
Add the payment to the invoice by clicking 'Payment' and typing the payment into the relevant section. (for example: If it is paid by Cash you would type the amount next to cash) Once you have added this then click save or enter to apply the payment.
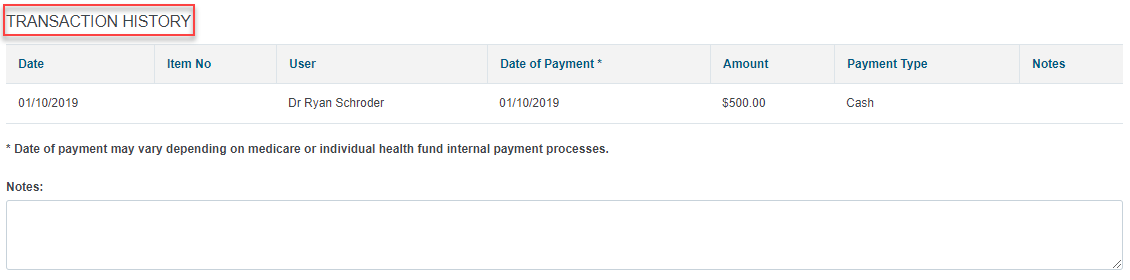
13. Once the details are saved the amount due should show zero and the 'Transaction History' will show the applied payment details. Click the 'Print' option to Print the invoice and send a copy to the workcover company.
14. If this is a private invoice click the 'Claim' button if the patient is entitled to a refund from Medicare. Once you do this a new tab will highlight itself with the patient claim information that has been sent to Medicare. They will receive their rebate from Medicare.
